Guzzle Boom! / Development diary
The Mushroom Patriarch: read the spores before you bite
How we reworked the mushroom boss’s second phase: the spores switch places, the charge builds, and you need to find shelter before the blast.
The Mushroom Patriarch has a good spore. Eat it, and the boss starts charging energy. Poison clouds appear over the arena, followed by a mycelium blast. “Good” asks for a little trust here. But that spore starts the chain that leads to your next bite of the boss.
In the new chapter of Guzzle Boom!, the Patriarch meets the hero in Spore Forest, beyond the old route to the Giant. For our first devlog, we chose its second phase: it’s easy to come up with a dangerous attack sequence, but explaining it on a small screen is another challenge. This is a look at a version still in development. These changes aren’t in the installed Android build; the screenshots below come from a separate run of the current PC version.
One good spore, then another
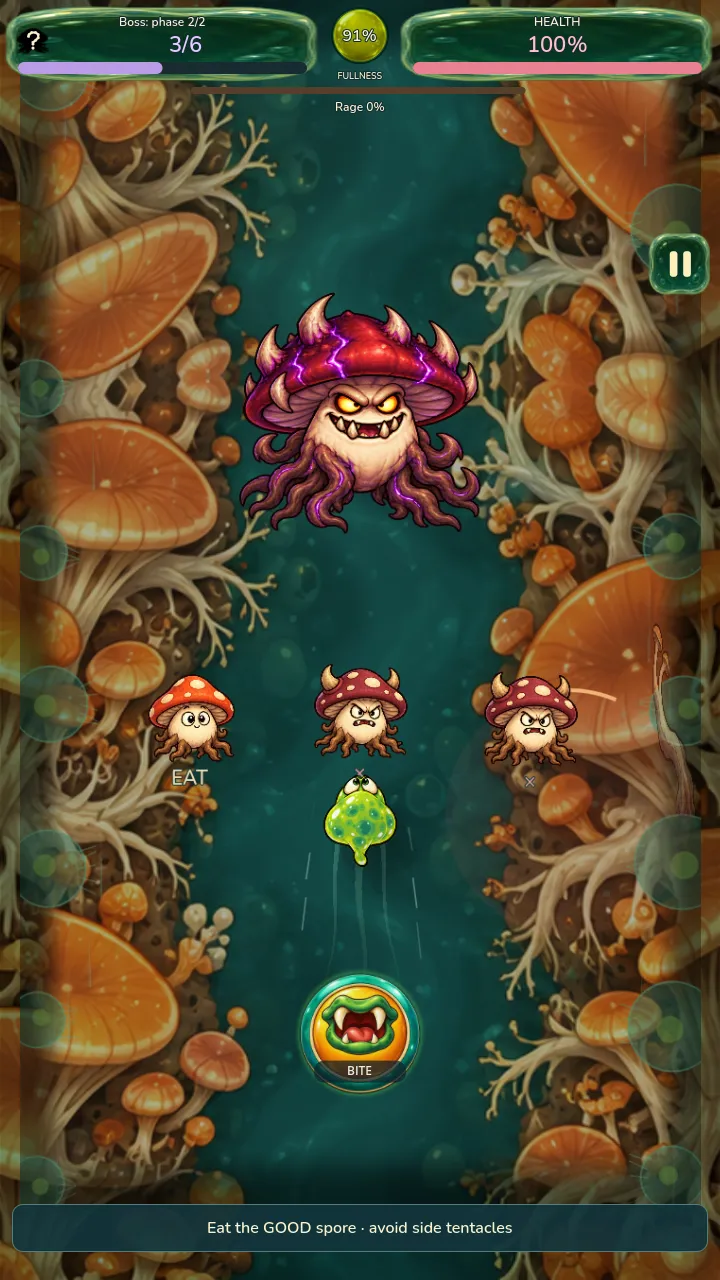
In the first phase, you need to eat two supports while dodging the mushroom’s spit. After three hits, it turns into a mushroom demon. Three spores appear in front of it: one good, two evil. They switch places regularly, while a mycelium tentacle occasionally grows at the side of the arena. You have to track the right spore while leaving yourself room to dodge the attack.
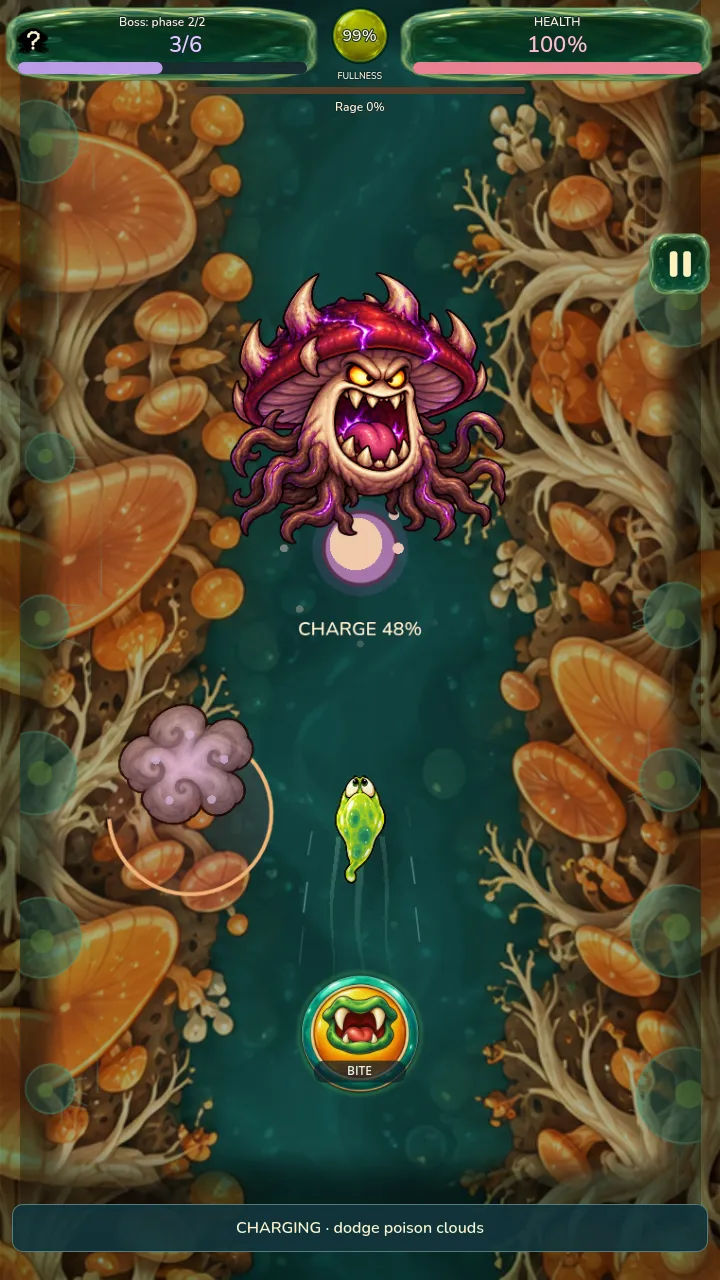
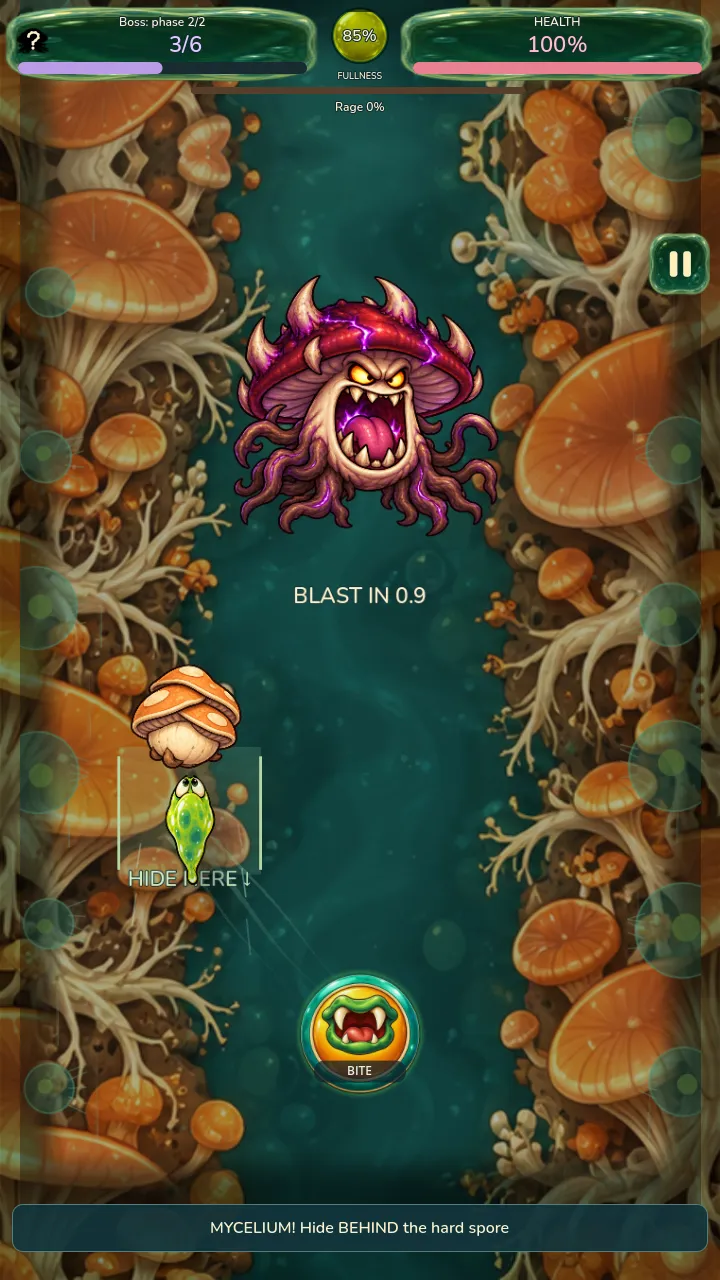
A mistake doesn’t reset the whole puzzle. Bite an evil spore, and only that spore disappears; the hero takes damage, and the others stay. The good spore starts a five-second charge and sends out three poison clouds. Then a hard spore appears, marking a safe corridor you need to reach before the blast. Survive it, and you get another choice of three spores. The second good spore stuns the Patriarch and opens a window to bite the boss.
It’s a short chain of decisions: choose what to eat, dodge, find shelter, choose again. There’s a dangerous pause between the first right bite and the reward. The screen needs to show both how that pause is unfolding and when it’s time to change what you’re doing. A single instruction at the bottom isn’t enough: while you read about shelter, the hero is still in the arena.
When the arena gets crowded
After the first rework, the sequence was already in the fight, but the effects felt static and the second phase was hard to follow. The causes were specific. The clouds and energy orb relied on still images. Extra jagged lines, red rectangles, and exclamation marks were drawn over the side tentacle. When the three spores switched places, they crossed paths at the same height.
In that tangle, even a familiar target is hard to track. You’ve just seen the good spore, then all three bunch together—and you have to search for it again. Meanwhile, the tentacle, warning, and decorative lines all compete for attention in the same part of the arena. We removed the duplicate lines, rectangles, and extra rings. The side attack now has one growing tentacle and a compact warning at the hero’s height.
The spores also take different paths when they switch places: the returning spore follows an upper arc, while the other two move below it. Their labels disappear while they’re moving. Once they’re available to bite again, the good one is marked EAT and the evil ones with crosses. The brief ban on biting during the switch remains. That way, labels don’t travel in a tight cluster with the mushrooms; they appear when you can act on them.
Showing when an attack will land
The poison cloud now grows, drops toward the hero’s height, expands before striking, and dissipates. Beneath the boss, a pulsing charge grows as particles gather around it; a percentage shows how far it has built up. Together, these cues show how close the attack is. The cloud is still dangerous, though—you need to get clear, even if you want to see how big the orb will get.
A separate countdown and a hard spore marking the safe corridor appear before the blast. After the warning, the mycelium spreads to either side, leaving a passage beneath the shelter. The task changes: first you dodge separate clouds, then you need to reach a specific spot and wait out the hit. That’s why the shelter warning is separate from the charge.
In the latest visual update, we kept the damage, timing, and hit rules the same. We changed how they’re shown. Automated checks completed full fights with four heroes across three sets of starting conditions. They also checked battle recovery from a save and protection beneath the hard spore. That verifies the rules; it can’t establish whether the fight feels manageable to a person. For that, we still need a real fight where nobody already knows which way the good spore will run.
Three moments in one fight
These are development screenshots with the interface intact. Open each one to see the spore choice, the charge and cloud, or the shelter before the blast.